SLIDES FROM PRINTS
I can still remember the thrill I felt when I saw, for the first time, a colour transparency projected onto a screen. It was an image of the Isle of Skye, one I had taken from a ferryboat, approaching the island on a misty Friday evening. To be honest, looking at it now, it’s not the best piece of landscape photography I have ever taken, but it was one that made an everlasting impression on me. The colours & sense of depth or third dimension were magical, it was like I was transported back to that place & time. I was hooked for life!
My own photography in the 30 years since then has comprised mainly of shooting monochrome negatives & colour slides. Monochrome prints were produced from the negatives & colour prints from the colour slides. In my opinion it was an ideal combination & one that I would have continued to practice forever more. However along came digital imaging. Colour darkroom printing was quickly rendered obsolete, colour prints made from film scanned into a PC, via a good quality scanner, or images taken on a modern high spec digital camera, are generally superior to the majority of those produced in darkrooms. The flexibility & possibilities available in digital imaging software are seemingly endless & limited only by the photographer’s imagination.
Although I continued to shoot mono negatives & colour slides that I then adjusted, or manipulated in the PC to produce prints, I felt a certain frustration that I did not have slides of the finished pictures to project or enter in international exhibitions. Digital projectors are very expensive & the quality of the projected image does not, in my opinion, match that of a 35mm slide projector. There were of course a number of companies who offered the service of producing slides from digital files but they tended to expensive & colour balance & matching seemed to cause problems. Tales of people photographing the PC monitor to get slides sounded interesting but the results were rather disappointing & certainly well short of the standard acceptable for International exhibitions. There had to be a way round the problem & course there was, make a print & re-photograph it using colour slide film. This method is simple, cost effective & allows you to make as many identical copies as you need. When done properly, following a few simple guidelines, the final results can be indistinguishable from first generation colour slides.
THE TECHNIQUE
Producing the Print
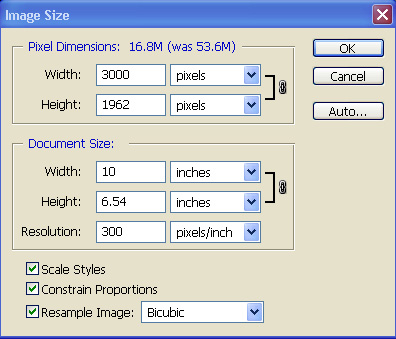
As with any technique a number of key factors make the difference between success & failure. When you have the final image ready to be adjusted for printing set the IMAGE SIZE to 10 inches on the longest side at a resolution of 300 pixels per inch. Print the image on Photo heavyweight Matt paper. Using Photo Matt paper is very important. It eliminates surface reflection problems when re-photographing the print. A larger print serves no useful purpose. A 10x7 inch print will photograph & produce a slide of just as good quality when projected, to the naked eye, as say a 16x11 inch print.
Film for Copying
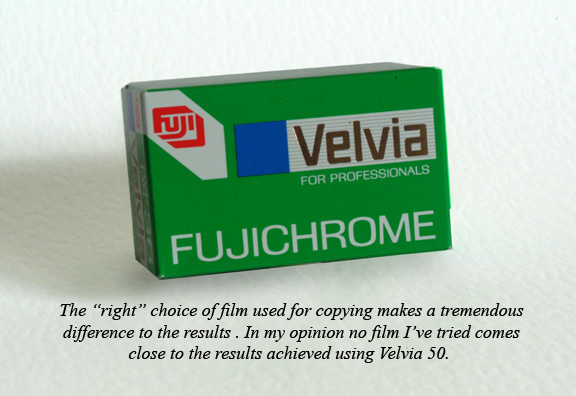
The choice of 35mm film for re-photographing the print is another important factor. A slow, fine-grained film gives the best results. In days gone by I would have reached for Kodachrome K25, sadly it is no longer available. Fujichrome Velvia 50 ASA is now my stock slide film used for print copying. I have tried many films but none come close to the results obtained from Velvia. It would be a good idea to experiment with different films to see which one works best for you.
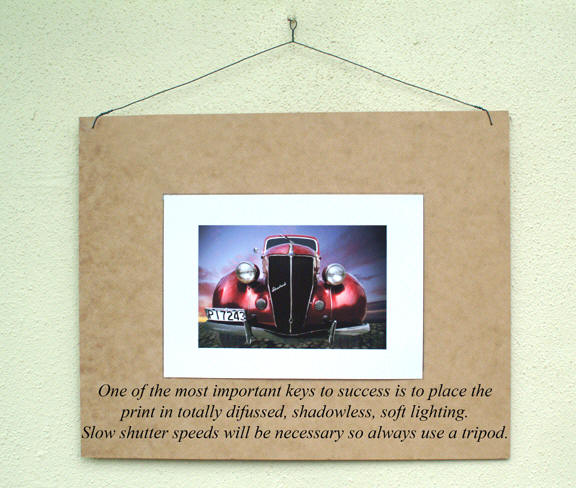
Soft diffused daylight is essential. It is very important to avoid strong lighting that results in high contrast. I do my copying indoors; my lounge has large south facing windows fitted with white vertical blinds. No matter what the lighting conditions outdoors I am able to control the amount & texture of the light in the room. This arrangement works well for me, but no doubt even diffused lighting can be found somewhere in most homes.
Photographing the Print
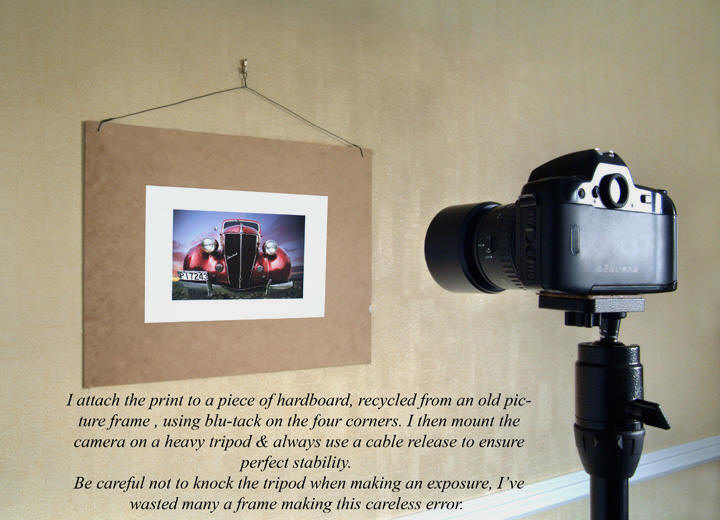
I attach the print to the west wall of the lounge & position the camera, fitted with a 90mm macro lens & cable release, on a heavy tripod. It is essential to ensure that the camera & print are aligned & square & that the image fills the frame. The choice of lens is personal preference but a macro lens is ideal for flat field subjects. After extensive testing with grey cards & exposure compensation I concluded that most prints record well without any adjustment to the straight through the lens meter reading. After saying that, others can benefit from ½ stop over or under the metered value. Keep records & you will soon recognize which ones need this treatment.
I aim to make 6 copies of 6 different images on one 36-exposure roll of film. The quality of the resulting slides should be well up to international exhibition standard. Many are included in my photographic talks where they are accepted as the equal of, or better than, first generation slides. Look upon the prints as “masters” & store them safely for future copying.
Photography has always been an art form with ever changing or evolving techniques; digital imaging is without doubt the most significant development since colour photography. It is wonderful to live & practice photography in this day & age & be able to create images using the tools & techniques that are now at our disposal. Digital file storage of images is also very useful. However I cannot put 100 digital images on a lightbox & sort them quickly into order. I cannot put a digital file into a hand held viewer or hold it up to the light to quickly identify it. Most important of all, I cannot enter a digital file into every colour slide international exhibition. I can do all these things with colour slides. Combining the old with the new,picking out the best of both is, in my opinion, the logical way forward.